The Art of Bleed: Why It’s Crucial for Your Printing Projects
Introduction
In the world of commercial printing, there’s more to a successful project than just choosing the right paper and ink colors. One critical aspect that often goes unnoticed but plays a vital role in achieving professional and polished results is “bleed.” If you’re new to the world of print, or if you’re a seasoned pro looking to brush up on the basics, this blog is here to guide you through the importance of bleed and how to use it effectively in your printing projects.
What Is Bleed?
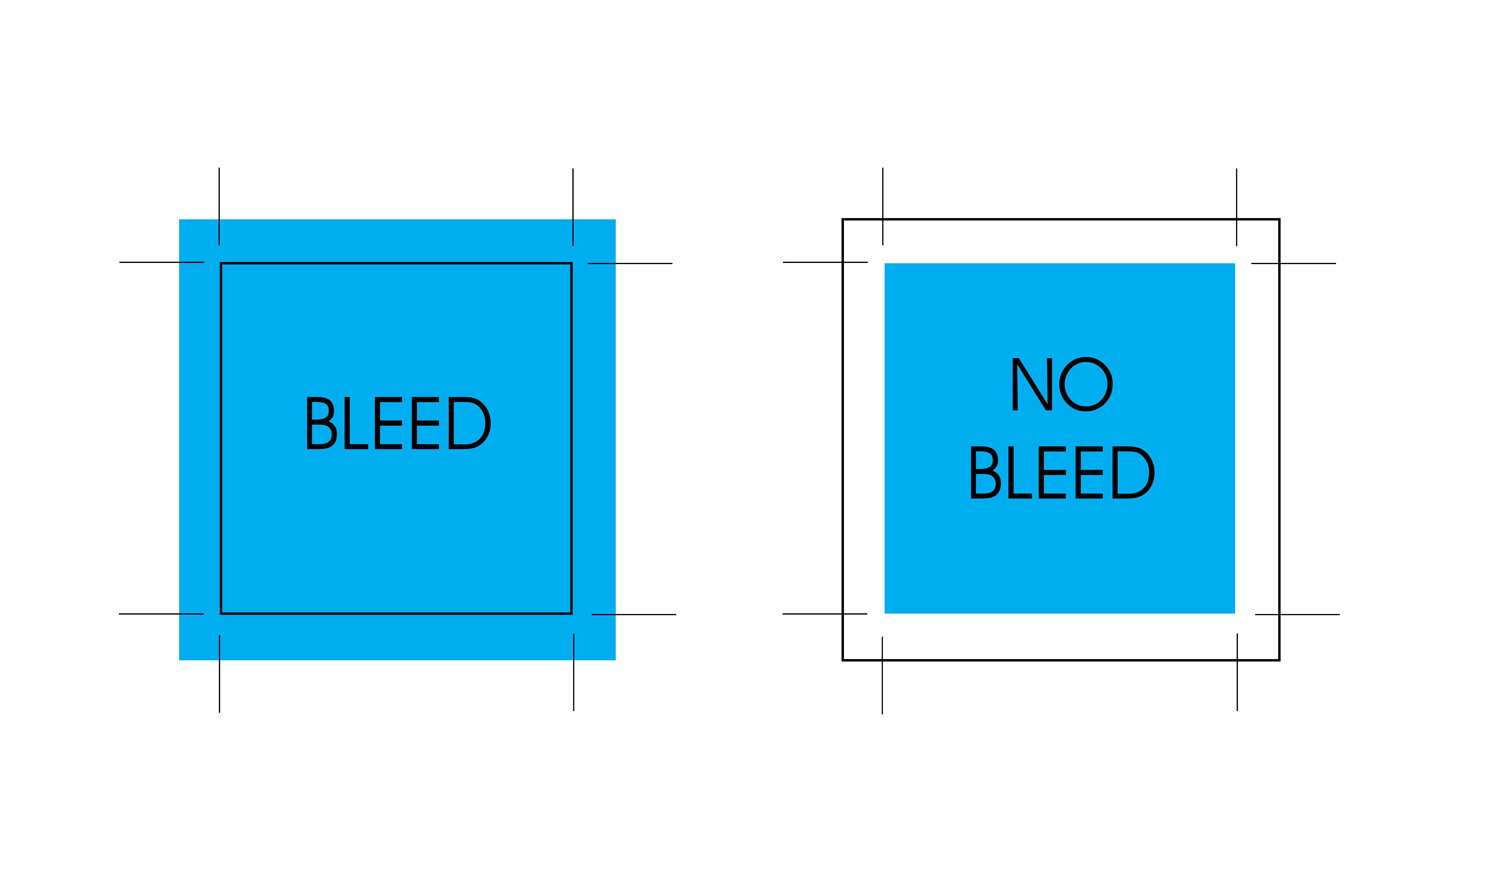
Bleed refers to the extra area around the edges of your printed document that extends beyond the final trim size. It’s a safeguard, a little buffer zone, ensuring that when your project is trimmed, no unwanted white margins or unprinted edges are left behind.

Why Do We Need Bleed in Printing?
- Precision in Cutting
Commercial printers use large sheets of paper or other substrates and then cut them down to the desired size. Without bleed, even the slightest misalignment during the trimming process can result in unwanted white edges. Bleed allows for this variance and guarantees a clean and precise finished product.
- Vibrant and Professional Appearance
Imagine a business card with a colorful background that doesn’t extend to the edges. Without bleed, you’d likely end up with an unsightly white border that disrupts the design’s continuity. Bleed ensures your design elements flow seamlessly to the edge, providing a professional and aesthetically pleasing appearance.
- Safety Margins
Bleed also provides a safety margin for content placed close to the trim line. Text or important graphics positioned too close to the edge can be accidentally cut off if there’s no bleed. With a sufficient bleed area, you can be confident that all your critical content will remain intact.
How to Implement Bleed in Your Design
- Determine Bleed Requirements
The standard bleed size is typically 1/8 inch (0.125 inches) on all sides, but this may vary depending on your printer’s specifications. Always check with your printing company for their specific bleed requirements.
- Expand Your Document Size
To include bleed in your design, you’ll need to extend your document size by the required bleed area on all sides. For instance, if your final document size is 5×7 inches, your document with bleed should be 5.25×7.25 inches.
- Extend Background and Design Elements
Now, extend any background colors, images, or design elements that are intended to reach the edge of your printed piece into the bleed area. This extra coverage ensures that your final product will look as intended even after trimming.
- Maintain a Safe Margin
Keep important text and elements that shouldn’t be trimmed at least 1/8 inch (or as specified by your printer) away from the trim edge to ensure nothing vital gets lost in the cutting process.
Conclusion
Bleed is an essential but often overlooked aspect of commercial printing. By understanding the role of bleed and implementing it correctly in your design, you’ll ensure your printed materials have a polished, professional appearance. Don’t hesitate to reach out to your trusted printing company to clarify their specific bleed requirements and guarantee the success of your projects. With bleed, your designs can truly shine, free from the limitations of white margins, and stand out in the competitive world of commercial printing.


